Twitch is by far the most popular streaming platform for gamers because it is made for gamers. That said, there are plenty of different gaming consoles that you can stream on Twitch as some people actually found their niche market in the streaming industry by streaming classic consoles such as the Super Nintendo Entertainment System or SNES. But, as old as the SNES may be, how can you actually stream it on Twitch?
Streaming SNES on Twitch is possible, but alongside the usual equipment (microphone, camera, broadcasting software), you’ll need a special device called a capture card which will allow you to stream directly from your SNES.
In today’s article, I am going to tell you everything you need to know about streaming your SNES gaming sessions on Twitch. It’s not as easy as streaming via the PS5 or the newest Xbox, but it’s still possible and I am going to deliver a detailed guide on what you need and how you can do it. Enjoy!
Can you stream SNES on Twitch?
Streaming old video gaming consoles might seem like a very abstract concept, since these consoles aren’t really compatible with the concept of streaming. The Atari, SNES, or even the original PlayStation console were released in a time when streaming was practically unknown, in a time when gaming was just personal fun and not a complete industry.
As the years passed, gaming became a lucrative industry and players realized that, by streaming, they could earn a lot of money and thus gaming became an industry. Modern consoles are completely compatible with streaming, they even offer the possibility of streaming without any additional devices, but the same doesn’t go for older consoles.
Okay, to be fair, the interest in streaming older consoles is really not that big in the modern era, but there are surely gamers who’d want to stream it and viewers who’d want to watch it. But is it even possible?
Older consoles cannot be used for streaming without additions, but there are some devices that you can use to stream even from these consoles and that is really great news. In the next section, I am going to go into more detail about these devices and the whole process of streaming from older consoles, while focusing, specifically, on the SNES.
How to stream SNES on Twitch?
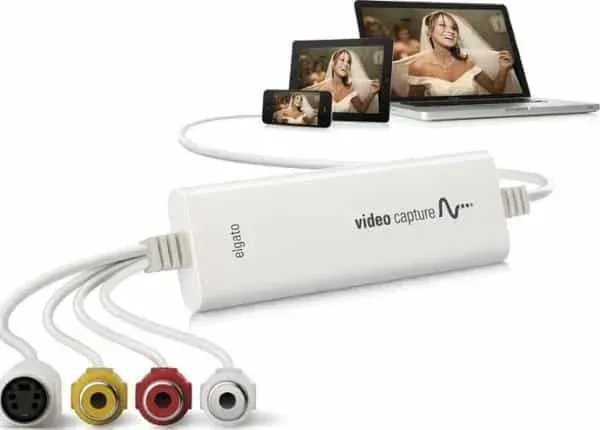
The first thing you need to do is get a capture card. Since the SNES doesn’t allow direct streaming, you’ll have to rely on a capture card, which is easily obtainable and is not overly expensive. The capture card will allow you to stream at a higher resolution than the original one on the SNES.
The next piece of equipment you’re going to need is a microphone and/or a webcam, although they are not mandatory. Namely, a lot of streamers use a webcam and a microphone to make their streams more dynamic, but you don’t need to do that if you’re camera shy. Still, I would recommend getting at least a microphone, as it’ll make your life much easier.
As for the software, you’ll need something to control your audio and video output. Find a good piece of broadcasting software that you can download for free; it’ll give you a lot of features through which you can control the audiovisual output of your streams. Of course, if you’re willing to spend more, there are paid alternatives that’ll offer you even more but that choice is up to you.
Before you actually begin your streaming, there is one thing you need to know about SNES. Namely, SNES doesn’t really like it when you stream from the console as the company gets absolutely nothing of the streamer’s revenue. They do tend to push ads in there to make your life harder, but they generally dislike it when people stream from the console.
Now that I’ve cleared this up, let me help you in setting up your streaming infrastructure. Aside from the above-mentioned pieces of equipment, you’ll need a functional PC that is compatible with streaming on Twitch. This means that you’ll need at least 8GB RAM, a processor that should be Intel Core i5-4670 or better, and a new(er) graphic card. This is all the basic architecture for your capture card to work fully in liaison with your streaming software.
Finally, create an account on Twitch and you’ve done all the preparatory steps. You can now begin setting up your stream.
The first thing you need to do is disconnect the HDMI cable if it is connected to your TV; if not, you can just skip this step. Once that is done, you have to plug in your capture card and also connect it to your computer via the USB cable. Next, find another HDMI port and connect this to the port at the back of your TV.
Now, go to your PC and launch the broadcasting software, which you have to link with your Twitch account. This is quite easy to do and does not require any advanced technical knowledge, as the software is user-friendly and very easy to operate, with straightforward directions and options.
Now, open your broadcasting software once again, find and select ADD, and then select a video capture device. Now you can add your card, which you have connected as I have said. A small screen is going to appear on which you will be able to see your stream. You can manipulate and resize it easily. Find the ‘Start Streaming’ option in your application and then wait for everything to synchronize, while following the progress on the small screen. After a couple of minutes, you’ll be ready to stream on Twitch and that’s done.
If you want to add a microphone or webcam for a better experience, that’s also easy to do in the application.
