Collecting SNES games, means collecting SNES games cartridges and with some of them being decades old, it’s not surprising that they are often found dirty and potentially not working properly when plugged into the console. This is where a little love and attention could go a very long way in restoring your game cartridges to work perfectly for now and many years to come.
In order to properly clean an SNES cartridge and cartridge pins, you’ll need to disassemble the cartridge and then carefully clean it with a Q-tip and using some sort of solution. After that, you need to reassemble your cartridge and you should be good to go.
In today’s article, you are going to learn how to clean your SNES cartridges and cartridge pins. I am going to give you a detailed guide on how to do each of the necessary steps and how to do them successfully, so that you can continue using your game afterward. It’s going to be an informative article so enjoy!
How do you clean SNES cartridges, cartridge pins, and cartridge connectors?
Since the whole procedure is practically identical for each of these elements and you can use this one procedure for each of the elements, which is why I have decided to unify the process and give you a detailed step-by-step guide on how to do this.
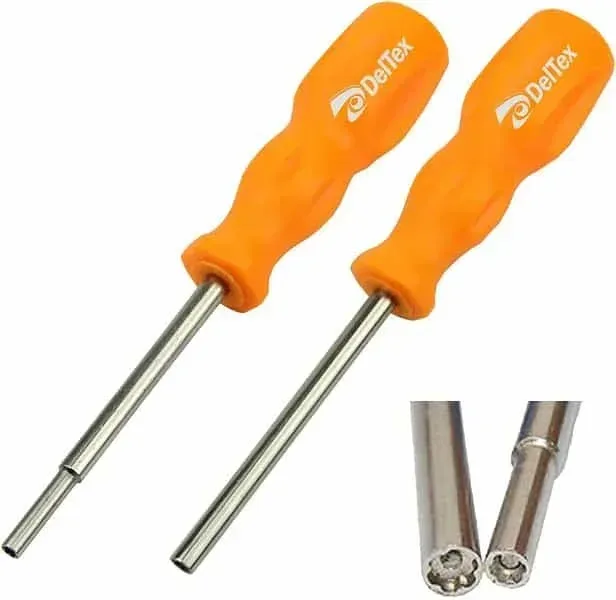
The first step, of course, is opening the SNES cartridge. To do that, you’ll need a special screwdriver bit. Unlike classical NES carts, which use the same procedure but can have some variation in the number and type of the screw, officially licensed SNES cartridges always have two screws on either side of the front of the cartridge.
These identical screws require a special 3.8mm security bit to remove; luckily for you, this is the exact screw you need to open most NES games. The most difficult part here will be to find such a screw, but there are online sellers from whose stores you can get it.
Now, you’ve probably heard that is possible to clean a SNES cart without actually opening it, but I highly recommend doing it this way, as it is far safer and more practical. Avoiding this will reduce you to using simple Q-tips to get into that very small opening in the cartridge bottom, which is never as successful as this method.
Once you’ve opened the cartridge, you can begin the cleaning process by taking the game’s motherboard out. If you want to do a proper job, you’re going to need some useful items: small pieces of cloth or cleaning rags (which you can never have enough of, trust me), and a cleaning substance (there are a variety of different solutions you can use, from alcohol to contact lens cleaners, but your best choice, in my opinion, would be a simple metal polish substance that will effectively do the trick for you).
When you’re ready to begin, simply apply some metal polish to the motherboard and then use the rags to scrub and clean it. You should scrub the length of the contacts back and forth with some solid pressure, after which you’ll immediately see the filth being removed; a good sign that you’re doing a good job is your cloth, which is probably going to turn black or grey, depending on how much dirt there is. When you’re cloth is completely dirty, just repeat the process with some extra polish and a new cloth.
How long does this last? Well, until your cloth remains clean. In my experience, it’ll generally take you two or three times to clean the game’s motherboard completely. What should you do next? Well, the same thing, just with the contacts and the pins.
The procedure is completely the same and there is nothing to it except being careful you don’t bend or break something. You can even use a Q-tip in this instance, as it is going to be easier to deal with the smaller pieces in such conditions. After you’re done with this, you can go on to the third and final step – reassembling your cartridge.
The first thing you need to do is put the game’s motherboard back into the cartridge, just as it was before you took it out. If you’re worried about getting this wrong, don’t be – there is only one way the motherboard can go back in, so you won’t be able to fail.
Before you actually screw the cartridge back together, do check whether the game works. The plastic pieces will stick while they’re inside the console so you don’t have to worry. Why do this? Well, remember how difficult it was doing it the first time? You don’t want to go through that if you don’t have to, really.
If your game works normally, you’re a-okay! Congratulations on a job well done, your game is completely clean and functional! You can now screw the cartridge back together. But what if the game doesn’t work?
There are three possible answers, as SNES cartridges are very picky. This is what could be wrong:
- The game just needs additional cleaning. They can be quite stubborn and in the majority of cases, all it takes is just a bit more repeating and you should be good to go.
- If number one doesn’t really do the trick for you, the game’s motherboard itself could be at fault with something more serious, probably a failure of an important component, severe physical damage, or liquid being spilled inside the cartridge. If this happens, you’re probably dealing with a faulty cartridge, but I can say that this is an extremely rare occurrence.
- Finally, the issue could be with the console itself. To check this, try to clean several games and testing them afterward; if none of them works, the console is at fault. This is probably due to the pins being broken, bent, or overly oxidized.
