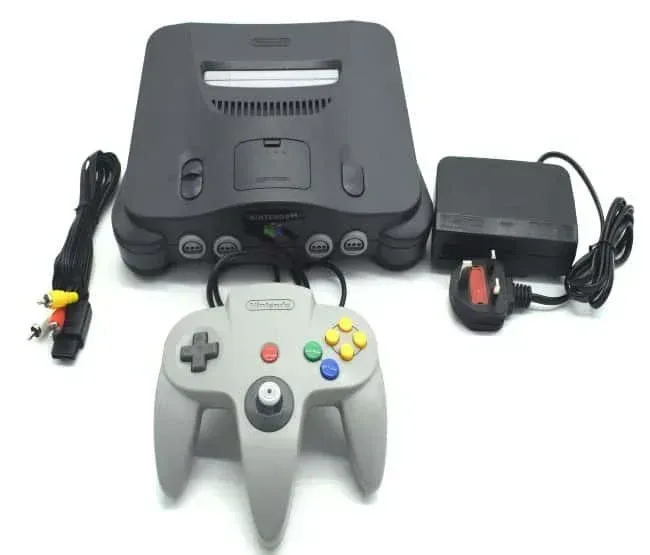
Insanely good games and an awesome iconic look makes the Nintendo 64 one of the most collectible retro gaming consoles in the world. But what happens if you manage to pick one up, only to find that the darn thing doesn’t switch on? Here are some simple things you can try to make that console sing again!
A Nintendo 64 might not work for you if there is a problem with the motherboard, the soldering, or if it is simply dirty. Providing there isn’t any water damage, just giving your console a thorough clean and checking if anything needs new solder could fix your problem.
In today’s article, I am going to be dealing with the issue of a Nintendo 64 that won’t turn on. You are going to find out the possible causes of this issue, as well as the fixes for each of these issues. Retro gaming is always fun and this article will, hopefully, help you to continue playing your old console! Enjoy!
In case you didn’t know
The Nintendo 64, also known under the code names Project Reality and Ultra 64 during its development phase, is a home video game console, released in 1996, from the Japanese manufacturer Nintendo in collaboration with Silicon Graphics. It was the last of the fifth-generation home consoles to be released. The Nintendo 64 has several peculiarities: it is a “64-bit” console unlike its main so-called “32-bit” competitors; the company preferred the cartridge support; it innovates by installing an analog stick on its controller which will prove to be essential for real-time 3D games; it is also the first console to have four controller ports as standard for multiplayer games.
The hardware of a Nintendo 64
Powerful and flexible, the architecture of the Nintendo 64 also became more complex and programming proved difficult for developers unfamiliar with the medium compared to other consoles of the time such as the PlayStation.
The Nintendo 64 is equipped with two microprocessors. The processor, called the “Reality Engine”, belongs to the R4000 family from MIPS Technologies and is manufactured by NEC. The “Reality Immersion Co-Processor” (RCP) is the coprocessor designed specifically by Silicon Graphics for the Nintendo 64. It is divided into two components: the “Reality Signal Processor” (RSP), which executes the graphics and sounds, and the “Reality Display Processor” (RDP), which displays graphics data from the display list created by the RSP.
For the RSP to create this display list, the application uses the system call to load firmware. The RSP is therefore fully programmable from the microcode. Although equipped with a powerful processor, the Nintendo 64 had technical limitations due to multiple causes.
One of the main criticisms of the Nintendo 64 was the blurry rendering of textures, contrasting with the pixelated appearance of the PlayStation graphics. If the anti-aliasing and MIP mapping techniques allowed textures to be smoothed when the view moved away from it or approached it, the limited capacity of the cartridges and the very low cache memory of the textures often resulted in this blurry rendering which became a hallmark of the console.
To hide the clipping issues, many games were drowned in a permanent fog. Adding in the limited audio storage capacity and overly complex architecture results in many Nintendo 64 games having lower sound and visual quality than their PlayStation counterparts.
However, by intelligently modifying the microcode and using various tricks, it was possible to overcome these limitations and exploit the full potential of the Nintendo 64. Development studios Factor 5 and Rare were notably renowned for having harnessed the full power of the Nintendo 64 from the console.
What causes your Nintendo 64 to not turn on?
The Nintendo 64 is a pretty robust device, so the chances that you’ll find one that won’t work no matter what you do are quite slim, unless something’s actually destroyed or burned, but that kind of damage will be quite obvious. You can’t really reconstruct a forest from ashes…
Assuming that the outside of your console is undamaged, there are usually four probable suspects:
- Corrosion of the board due to liquid damage
- The motherboard has some broken traces that need fixing
- A solder point is loose, and it needs a quick reflow
- There is build up of dirt that may need to be cleared
In the next section, I am going to explain what you need to do in order to fix your Nintendo 64 if one or more of the above-listed issues are to blame.
How to fix a Nintendo 64 that won’t turn on
First up, we need to cross off water damage from what is fixable. Many of the circuit boards from that period of time were not laminated and were susceptible to water damage. If the console was immediately surrounded with drying silica or rice there *may* have been a chance to save it – but if the water was left in the console, the corrosion it causes will most likely require the board to be replaced.
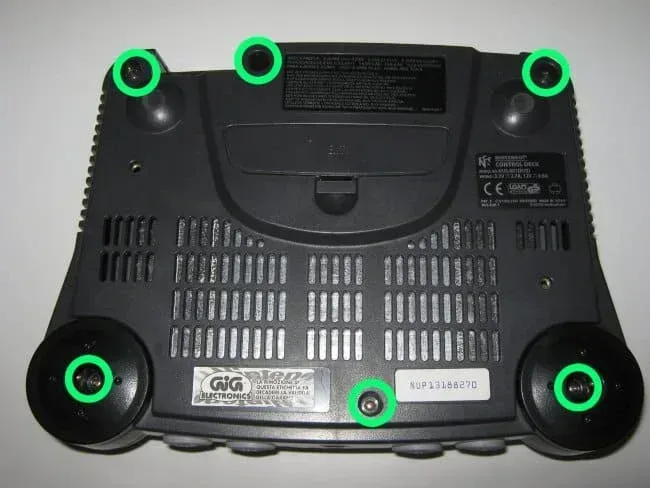
In each of the three remaining scenarios, we still have a fighting chance, but you’ll need to open your Nintendo 64 and see what’s inside to fix the issue. Unplug your device, turn it over, and we can begin with the opening procedure.
In order to successfully open your Nintendo 64, you’ll need a special “star” screwdriver that works on most Nintendo products, as well as some other consoles. There are six screws you need to take off.
After you’ve done that, turn it over gently, remove the top, and then you’ll encounter more some more standard (Phillips) screws to remove. Start with removing the power and AV out screw pairs.

Next, take out the cartridge holder screws

Then those around the central shroud

Then the expansion board – be careful here as these screw strip easily.

Finally, take out the lone screw to remove the whole of the motherboard assemble form the case.
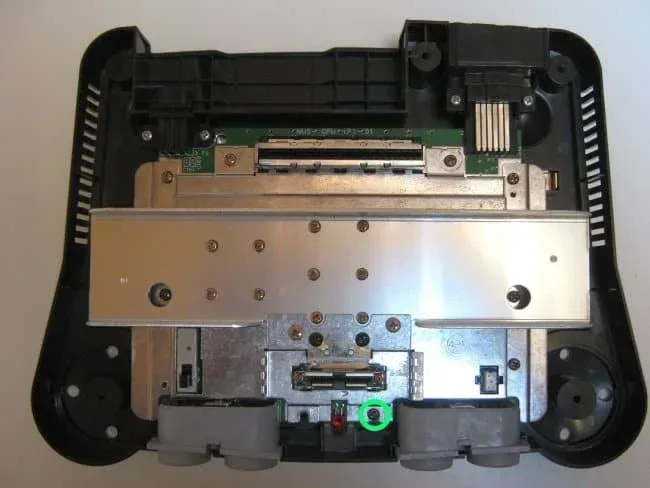
The next set of screws can be taken out without being in the case. Take off the two black screws and this releases a small metal clasp.
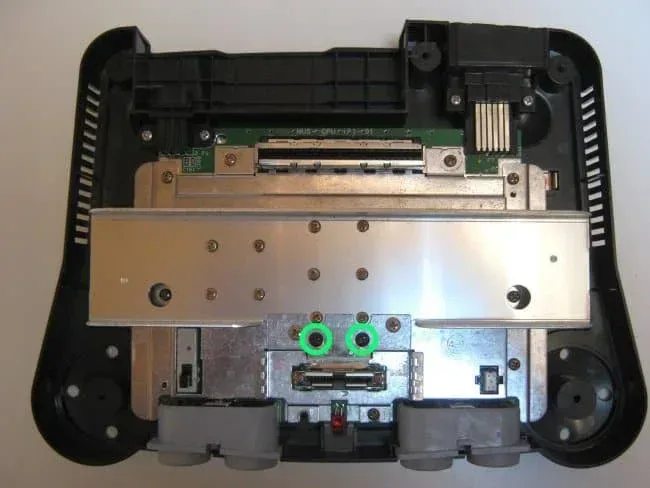
There are two screw holding a metal plate down on the rest of the motherboard – remove these next.

You can remove the last ten screws on the metal shrouding on the motherboard.

The metal shrouds on both sides of the board should not come off easily.
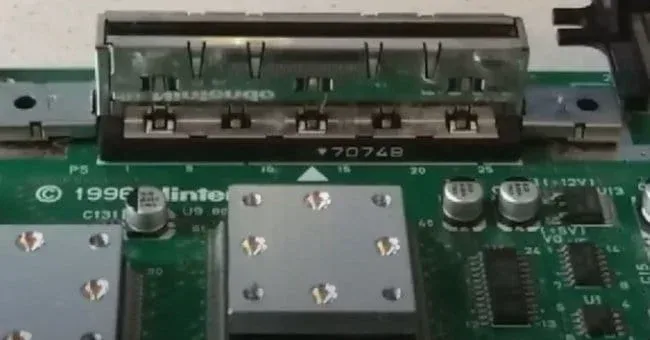
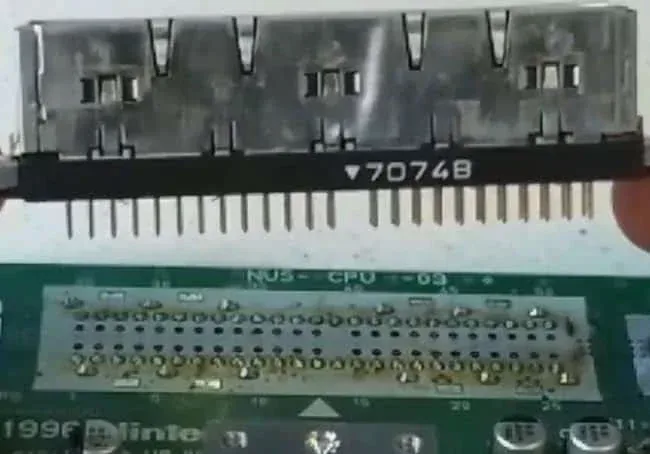
Finally, you should be able to gently rock/lift the cartridge holder up and off the mainboard, as it’s only held by pins into the board.
Cleaning the N64 motherboard
You’ll need a Q-tip and some isopropyl alcohol, but you can also use other appropriate solutions that will do the same thing without damaging any of the components. You should be very careful while doing this, both so you can avoid damage to your console and so you can do a thorough job, which is quite important here. Clean everything you see, even the small spaces between the components, and change your Q-tip whenever the old one gets dirty. Be patient and thorough.
While you work, keep these pieces nearby to dry (this shouldn’t last long) and then pick up the board (but watch out that you don’t damage it with your fingers). Now, this takes care of the third problem from the above-mentioned, but what about the first two?
Re-soldering the Nintendo 64
Quick disclaimer – do this at your own risk and if you are not experienced with as soldering, find someone who is. Although the changes are slim, there is a possibility of causing a short circuit on the board and making the console unsafe – if in doubt- do not attempt to make any soldering changes!
Before you actually touch anything else on the board, perform a quick visual check to see if any of the traces (lines on the green surface of the board) look broken. If they are, you’re in for some bigger repairs, and you should definitely ask advice from someone who has experience with fixing motherboards.
On the other hand, if you find some broken, missing, accidentally touching a soldered joint (or any other similar issue), the situation is far simpler for you. Namely, you’ll probably just need to heat up a soldering iron and reflow your faulty one (or add more if necessary). This is not difficult to do, but it’s better to ask someone who’s already done it if you’re unsure about your own skills, as you might do some irreparable damage.
Now, if your check-up reveals that there are no issues related to the board and the solder points, you can grab the Q-tips and the solution once more, as there is still more to clean. Gently clean all the connectors of the CPU and GPUs, along with any additional little solder points. You have to be extremely gentle, as these parts are very, very sensitive, and they tend to break easily.
Now that you’ve cleaned this bit, let’s go to the cartridge port, the usual suspect if your Nintendo 64 won’t start. For this, you’ll need a regular store loyalty card (or any similar card) and alcohol. A plastic card is the best pick because it has the right shape and the right thickness to properly enter a cartridge slot, plus they won’t get stuck and they won’t put too much pressure on the pins.
Gently slide it in and take it out, all along the cartridge port. Do it several times, as much as needed, reapplying the alcohol as needed. This is the first step. Secondly, add a bit of the solution you’re using to the pins of the jumper pack (or expansion pack, if that’s what you have inside your console) and repeat the above-mentioned procedure a few times, reapplying alcohol if necessary.
After you’re done with the cleaning, you have to reassemble everything in reverse order, just like I’ve explained above. Be sure not to forget anything and to reassemble everything properly, as the console can be quite picky when it comes to this. Also, make sure that the pieces you’ve cleaned are all dried by the moment you start reassembling the console.
Make sure your metal pieces have all dried by now (they should have, it doesn’t take too long with alcohol solvents) and close up the N64 again. That’s it a cleaned and now, hopefully working Nintendo 64 console – enjoy!
